Saturday, July 7, 2012

Appeteasers Edition 2: "I fell into a burning ring of fire"

Good Afternoon Crusaders,
Welcome back everyone sorry it’s been so long since we’ve talked; I know you missed me. I feel terrible having left you for so long, and ask that you forgive me and please continue to read these in the future. As a reward for sticking with me I have a special treat for you this time. It’s time for edition #2 of Appeteasers, and this one is guaranteed to light a fire in your belly and really make you sweat.

For this edition of Appeteasers we will be sampling 3 different varieties of hot sauce.  For anyone who knows me, they also know that while I do love flavor filled food, I also love my food to be packed full of heat. Anything that tastes delicious is made even more so by adding some zing to it.  I know not all of you can tolerate a lot of heat and that is understandable, it’s also a reasonable assumption that some of the food that I eat and put on here isn’t for everyone. I’m sorry if this issue isn’t your favorite and that your delicate palates can’t handle much heat, short stack herself can’t handle much more heat than a taco from Jack in the Box. But for the rest of us who dance in the flames this episode is for you.  Ok crusaders, it’s time we venture forth into the fiery pits that await, we’ll do it together and I promise you will come out feeling more alive on the other side.
 On this journey we’ll begin on the rough craggy peaks of bitterness  then we’ll work our way to the sweet sandy beaches of deliciousness. So to start things off we begin with “Blair’s AFTER death sauce, with liquid rage.”

See I wasn’t kidding, it really does say that.  Almost looks like this bottle belongs on the record cover of an 80’s hair band.  Apparently there’s a whole slew of these sauces ranging from eh, just a sweet sauce to mommy save me from the burny feeling.  It seems Mr. Blair also likes to make a special reserve that I can only imagine is the hottest thing this side of the sun. It is convenient though that on the side of the boxes that they include a handy little guide to help you figure out which one is right for you.
This is the first way that Blair’s helps you decide if this is going to be too hot for you or not.  It’s also nice to us veterans as it helps us find the name of the hottest one so we realize how badly we can burn ourselves and how much worse we can do so.


One thing I’ll say about this hot sauce, it’s nice that they give you a cute little key chain as if to provide a consolation prize to the intense pain that accompanies this sauce.  I’m including the nutritional value of these sauces for the health food conscious, even though none of the sauces we’re discussing have any calories they do all three have different sodium levels.  What you can’t see on the bottle nutritional value is the nice little warning that comes on the box one; that reads in big letters WARNING: THIS PRODUCT CONTAINS THE HOTTEST KNOWN INGREDIENTS ON THE PLANET. PLEASE USE EXTREME CAUTION.  This is the second warning they provide that this might or might not be the sauce for you. One thing is clear beyond a shadow of a doubt, they care about their cliental and want them to be safe when using their death sauce.  So now that we’ve discussed everything on the outside let’s get down to what matters most, the inside.
I want to take this opportunity to explain exactly what I will be providing you in this section of my reviews.  First I will discuss the bottle design itself as far as the top and how easy the sauce pours to help you prevent any unfortunate mistakes. Next I will discuss the aroma of the sauce, as aroma can make or break any good food. Then after enough beating around the bush, I will discuss the sauce itself. I’ll be showing you what the sauce looks like outside of the bottle so you get an idea of what we’re dealing with. I’ll be providing you with an ingredient list and a help deciphering it.  I’ll then be finishing with the most important part, how the sauce actually tastes along with some serving suggestions.
So this bottle has an open mouth, so be very careful when you pour it as it will come out fast. I personally hate bottles like this, it kinda reminds me of when some little punk unscrews the lid on a salt shaker and you go to lightly season your meal and BAM you’ve just created a little white mountain on your plate effectively ruining any hopes of enjoying any of it, stupid little punk if I find him I’ll ram a salt shaker up his nose! Ok enough ranting, like I said these bottles are a hazard so be careful when you use it.
The aroma of this sauce is something of an amalgamation of vinegar, capsicum, and sheer pain. You know when you see someone do a face plant trying to do a sweet jump with their bike and you just go “Oooohhh that had to hurt” and you do a sharp inhale. It’s almost like you can smell their pain, ya that’s part of the aroma of this sauce.
So you’re probably wondering what this death sauce actually looks like.

 
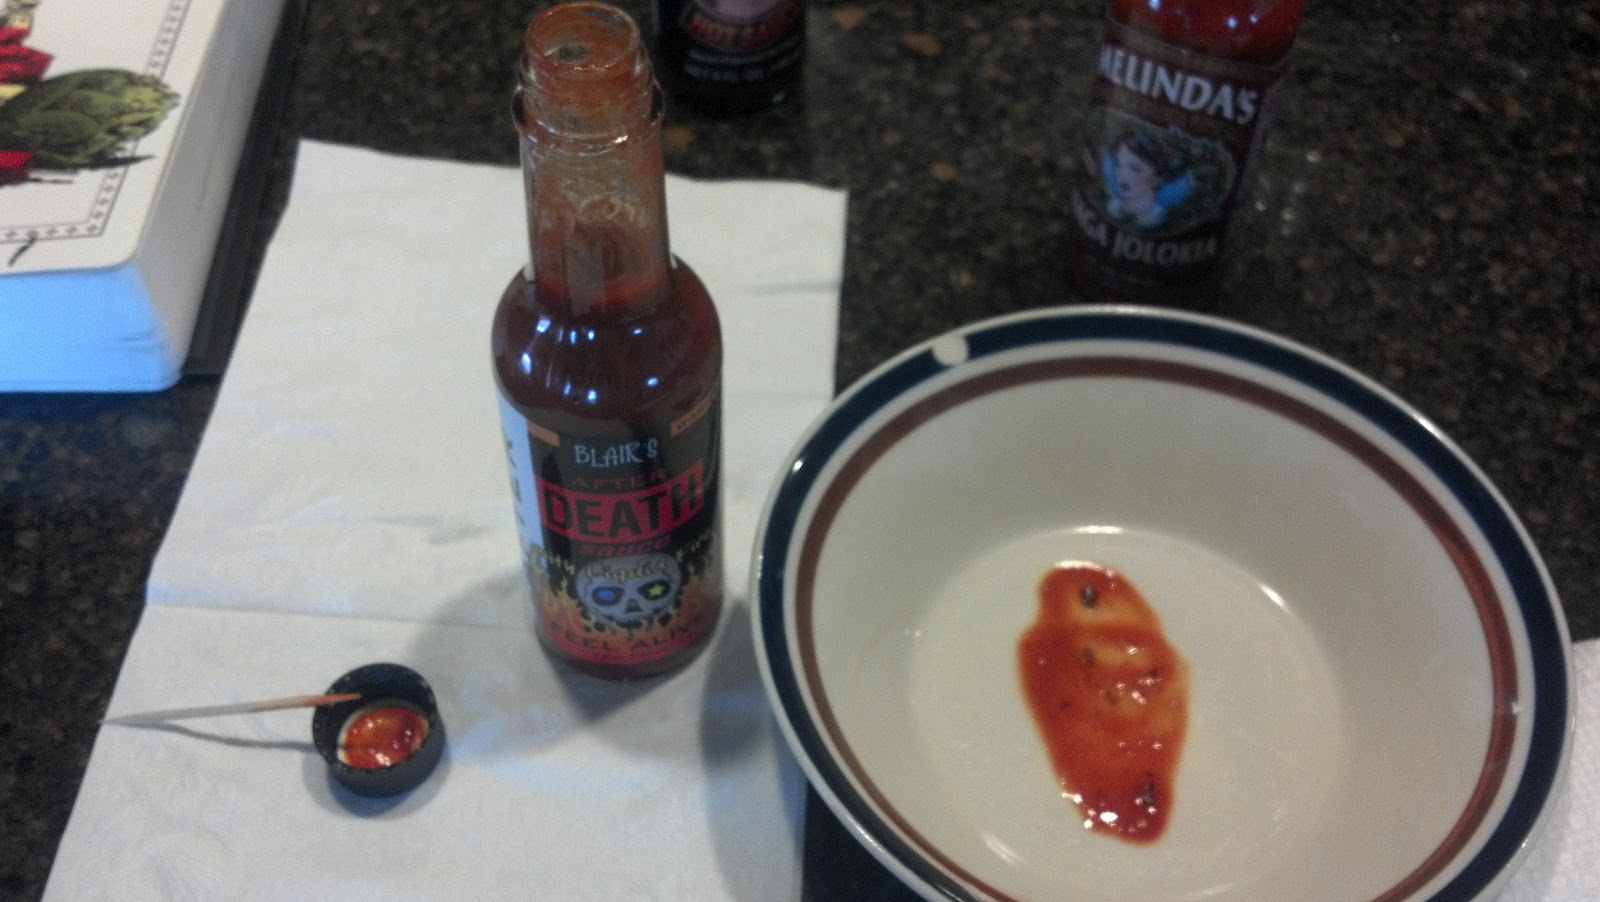
Now, I’m no expert in Gestalt psychology but I think I can see a skull in this sauce. It’s almost demonic looking isn’t it? 

Before we delve into what actually goes into a batch of this culinary magma I want to explain something. Chile peppers are rated on a scale known as the Scoville Heat Scale. This scale is named after its creator Wilbur Scoville, an American Chemist who in 1912 developed a test for measuring the hotness based on the amount of capsaicin (a chemical that stimulates the nerve endings in skin) contained therein.  With that in mind we can further discuss the ingredients and you’ve learned a new word you can win at scrabble with.  So the makings of this sauce of the damned consist of Habanero Peppers (150,000-577,000 Scoville Units depending on the variety), Cayenne Peppers (30,000-50,000 SU), Chipotle Peppers (5,000-8,000 SU), Vinegar, Salt, Garlic, Lime Juice Concentrate, Ascorbic Acid, Onion, Herbs, Spices, and Natural Flavor. Wow, it’s like a medieval dungeon in a bottle.  The moment you crack the seal you can almost hear a faint scream reverberating off castle walls. The good thing about this sauce is that it has no preservatives or artificial ingredients, which essentially makes this the greenest sauce I’ve had (Yes I know the sauce itself is red).

Now what I’m sure you’ve all been waiting for, the taste. You know with an ingredient list like this has I fully expected it to be very tasty and full of flavor; sadly I was mistaken. It wasn’t very tasty at all in my opinion. It did have great heat I will admit, more so than the others, though all that heat accompanied a very bitter taste. I think instead of complimenting one another the peppers over crowded the sauce and combine that with the lime juice and it was brutal.  The company suggests that you can “use this sauce on wings, meatloaf, seafood, chili, cheeseburgers, sushi, or ANYTHING YOU DESIRE!” this is a pretty bold statement they’re making that you can put this on anything. I personally would use it very sparingly, as a background flavor. I would add it one or two drops at a time to a much bigger mix, definitely not something you just want put on chips. I agree with the company when they say to use it in chili and meatloaf, I also think it would go good in a big bowl of dip or chili to add a great kick. While not the hottest thing I’ve ever tried it was definitely up there. I advise you to be careful, if you are going to use it just do so sparingly and with great caution.

Second up is Melinda’s Naga Jolokia hot sauce. This sauce is made from the “world’s hottest pepper”, the Naga Jolokia or “Ghost Pepper” to the rest of us.   I’ll freely admit it, it’s not for the faint of heart but I don’t know if I’d go so far as to say it’s the world’s hottest. I’ve had worse burns before from milder peppers but this one does have a pretty good heat index. It sounds like a bad Scooby Doo villain and it probably could be though as it’s not one to mess around with.
 To start off the bottle has a very foreign appearance with its beautiful lady on the front.  I personally like to think of Melinda as the patron saint of searing mouth pain due to her association with this sauce.  The nice thing about this bottle is that for those of us who are unlearned in the world of hot sauces it has a nice little back story of the pepper to help us get an idea of just how painful of a time we’re in for.
  

Isn’t that sweet of them? I think it’s nice to know just how badly I’ve screwed up and how painful my life is about to become. Too bad more things in life don’t come with labels like this. It not only lets you know that you’re about to ingest a liquid form of fire, but it gives you the story of the pepper itself. It even includes a phone number where you can contact them and tell them how badly it hurt to eat their sauce, that’s provided you can still talk with your tongue melted down.  I like how it tells you all the other peppers it beat to become the world’s hottest.  I almost half expected it to say “THIS IS SPARTA, TONIGHT YOU DINE IN HELL!!!” at the bottom as a final line to warn you. If I ever make my own hot sauce that’s what I’m going to put on it, and I’ll call it the King Leonidas. It’ll be in the shape of a Spartan and it’ll have a little lever on the back to make him do a front snap kick. But I’m getting sidetracked, back to the topic at hand. The top of this sauce is very pour friendly; it has a decent spout with a hole about the size of the diameter of a pencil. Be careful though with it being easy to pour it’s also easy to over pour and god help your poor body if you do that.  
The aroma of this sauce is actually quite nice, it’s a mixture of hot peppers and almost a hint of citrus. It smells fresh which is kinda nice, but I have a feeling that if you were to pour it on something that was hot, it could turn into an aerosol and you’d have a pepper spray type situation. Although on a small scale and with proper ventilation I think it could be nice and add a perfume of heat in some foods.


You can see in this picture the hole I mentioned and how easy it could be to over pour with it. You also get a sense of what the sauce looks like out of the bottle. Here, let’s take a closer look at the sauce itself.
Once again maybe it’s my eyes or mind playing tricks on me but doesn’t this one look like a little demon with horns sticking out the top?  It almost looks like it belongs in a horror movie. Yes, you’re not imagining it there are actual bits of the pepper in the sauce. Like little nuggets of pain, these add to the heat profile tremendously. The ingredients in this sauce are actually pretty varied: as mentioned in the name it has Naga Jolokia peppers (our old friend Mr. Scoville rated them at a 1,041,427 SU. Making this one the hottest peppers of our trio).  It also has carrots, onions, garlic, and passion fruit, papaya, and lime juice in it. The fruit gives a nice fragrance and a fresh, almost tropical taste to it.
For those of you who are interested here is a list of ingredients, complete with nutritional information.
Now what I’m sure you’ve been dying to know, how it tastes. I’m sorry to disappoint you, but the flavor profiles of all those fruits are just not very strong. They could just be weakened in the light of the fact that the pepper itself is so hot. It does have a light citrus tang to it on the finish with the heat following behind it. It’s not definitely not one prominent flavor in this. The heat definitely moves in like a fog though and blankets over everything after a short period of time. I know it sounds scary being “world’s hottest” and plus it has ghost in the title but trust me it’s not to terrible. For serving suggestions though I recommend using it sparingly as a background taste. It would be good with chili, or maybe as a way to add some heat to a BBQ sauce or maybe hot wings. While I do enjoy the heat it brings, I can’t see myself using this one except on special occasions. 
 Now for the Coup de grâce and my personal favorite of all the hot sauces we’ve seen today. To be honest probably my favorite hot sauce I’ve ever had. Drum roll……………………..

Yes!!! The three sweetest words ever combined on one bottle. BACON. HOT. SAUCE. Oh my sweet petunias, it’s like God looked around and asked me “Indiana Joe, what could you add to every food ever to make it better?” “Well I do like heat, but I also like bacon. Is there any way to get the best of both?”  “Here I made this just for you.” Ooo de lolly it’s a beautiful thing when two wonderful worlds come together. If Guinness is the nectar of the gods and bacon is the food of the gods then this surely is the seasoning of the gods.  Ok well if the sheer awesomeness doesn’t inspire you to go run out and buy a bottle I guess I’ll stop swooning and get to the reviewing of it for you.

                The bottle itself is very basic, from its short and sweet description to its comical drawing on the front. The top to this has the easiest pour of all the ones we’ve seen here. There’s an open top, with the hole being about the circumference of a dime. Yes this is the easiest one to dump a lot out very easily, but how can too much bacon be a bad thing? Just be careful with it, if for some reason you don’t like a lot of flavor.

                The scent of this one is like a summer campfire BBQ on the 4th of July up at the lake with friends. It smells exactly like you would think it should. Faint notes of mesquite and hickory make it almost smoky but it’s also sweet and bacony as well.  I wish my car smelled like this, although it might make me try and eat the head rests if I went to long without food.

This is the only one of the 3 that I don’t see the face of death himself staring back at me from the sauce. Maybe it’s due to the fact that there’s not little bits of pain floating in this one but all I see is a delicious almost caramel colored sauce. Here look at it close up.

Mmmm don’t you just want to pour it over your ice cream? No? It’s just me? Ok well maybe that’s a bit too far, but you see my point. It looks delicious and not at all scary like those other two sauces.

As for ingredients and nutritional value it’s the simplest and least spicy of the bunch. Containing only cayenne peppers (between 30-50 thousand SU) and New Mexico (100-1,000 SU) chilies this sauce is mild enough for even the prudish of palates.  I think one ingredient they forgot to mention on here, is pure liquid awesomeness.  Although it is definitely not a sauce for those on a low sodium diet, as it is pretty salty.

                I don’t think I really need to mention taste on this one.  It actually does taste of bacon, it’s not just some clever marketing ploy to get you to buy it. So there’s a faint heat but a great taste of bacon throughout on this one.  As for serving suggestions, I’d think that would be obvious. Put it on everything! Everything that is made better by bacon is also made better by bacon hot sauce. I could write a whole other article just on this hot sauce and all the wonderful things you could cook with it but it’s just easier to tell you to try it with whatever you think sounds good. There’s so much made better by this delicious treat and not much that isn’t so get out there and explore. Let me know if you find something exceptional and I might try it and write about it.

Well Crusaders, thanks for sticking with me and coming back to read about my adventures. Sorry again for taking so long to get this one out to you. I’ll do my best to not let that happen again in the future. I really appreciate your loyalty and readership. The mountains of heat may be arduous and for those of you who don’t brave the peaks thanks for reading anyways. For those of you who do like their food with a little smack in the face I hope I’ve provided you with an alternative to generic Tabasco.


 I just hope that I’ve inspired you and that you get the chance to try one of these sometime for yourself.  I haven’t got much more to say that wouldn’t be just repeating myself.  Thank you all again and until next time happy hunting and Bon appetite.


Indiana Joe


Sunday, March 11, 2012

Clam Chowder and Bread Bowl Nirvana


Good Afternoon Crusaders,

                Hello everyone and welcome again to your favorite guide to all things edible and delectable. I hope you all read my last appeteasers section and it made you hungry, because boy do I have a treat for you. Tonight was one of my proudest cooking experiences that I’ve ever had, and it made me proud to be a foodie. Although it wasn’t exactly the cheapest of meals the end result was priceless. I bet you’re wanting me to hurry up and tell you what exactly it was that was so good I feel that if this were medieval times that minstrels would sing ballads about it for years to come. Well just so I can keep you as my loyal crusaders I’ll tell you, short stack and I made homemade clam chowder in homemade bread bowls and we made it all by hand and all from the ground up. That’s right there’s no Campbell’s cans hiding in the back ground I promise you.

 I respect you all too much to lie to you and hide facts from you, it was not a cheap dinner and some of the ingredients were hard to obtain. I should also let you know that I had to cheat and use recipes this was not just off the top of my head. I know, I know I’m sorry but even the mighty need help sometimes. I’d never made either of these items before so I had to get some advice from someone who’s been there. Who better to ask than the mightiest of the mighty? Go for the internet and take your pick of the best around. I should also let you know that we kind of jumped around between starting the bread bowls and working on making the chowder. Short Stack and I both worked hard on this so you’ll have to forgive me if it doesn’t seem like there’s a logical order to what we did. I will try to keep things as best I can in some sort of order. When necessary we multitasked and did multiple jobs at once to make things easier. Please bear with me and don’t nitpick too much on the progression.  In order to keep you reading I’ll wait until the end to post the links. *Insert Evil Laugh Here* so let’s get started right away.

Well what better way to start a long journey into the unknown than by making sure that you have all the necessary items you need. This veritable cornucopia of food stuffs is all you need to make 8, yes that’s right 8, bread bowls and about 5 cups of hearty chowder. It doesn’t really look like all that much stuff does it? That’s because it’s really not when get right down to it. I’m sure many of you were are probably like me and thought that a lot goes into making something so delicious, though it just isn’t true I promise.  The hardest part really is getting everything all together and just taking the time and effort to do it.
Remember when I said that there’s not a real order to speak of, well we’re going to start by talking about the bread bowls and how those were made. Those were the easier of the two items and add a great touch of elegance to the meal. Anyone serve chowder in a bowl but it takes true talent to serve it in a bowl you can eat, at least I’d like to think so.  I should let you know that we made these bread bowls all by hand, that’s right no bread machines here, and I know that probably scares a lot of you but I promise that it really isn’t as hard as we’ve all been lead to believe.  
First we had to mix everything together until it’s roughly the consistency of goop. I think that’s even the technical term of bread before it’s solidified into loaf form.  Before you say anything, yes we used an electric mixer, we had no other choice my hand mixer was busy being an antique. Moving on, once you get it nice and soupy you have to add lots and lots of flour to thicken it up.
There, that ought to do it! It takes a lot of flour to make this bread so don’t think freak out if it looks like you’ve added too much.  Just fight your instinct to stop and add what the recipe calls for.
 Now comes the best part though, pretend that you’re back in colonial times and knead the heck out of that sucker. According the wonderful folks over at Williams-Sonoma kneading is defined as “folding and pressing dough repeatedly to develop the structure of bread.  During kneading the gluten in flour interlocks to create and elastic network that captures gases and stretches as the bread rises.”  In other words just work it around in your hands like you’re a little kid who just got his first thing of play-do. Throw it back and forth with a friend for a quick exercise, put it on your table and pound it like it’s the boss’s face, or just squish it between your fingers for a giddy little thrill. Whatever you like to do just don’t stop for about 10 minutes. There is one problem though if you’re making this with a partner they’re gonna want in on the action so don’t be stingy, you do it for 5 minutes and then let them do it for the last 5 minutes. It’s fun, it relieves some stress, and you’re making good food in the process. Just don’t do it too long or it can make the dough way to gloopy and flexible and who needs that.

So when you finish having fun, err I mean kneading the dough in a serious manner, then your dough should look something like this. Then it’s good to put it in a nice greased bowl and cover with some clear film. Now are you ready to be amazed? I’m going to show you a magic trick. Just give me a little while to pull it off…..Little longer…..Little longer…..Little longer….Ok Now!!!!
Amazed aren’t you? ZING!!! It’s almost doubled in size. Pretty cool huh? I know, I know I’m pretty good magician. Ok well in actuality it’s because of the yeast but still pretty cool. Anyways welcome to stage two, now that the dough has risen significantly we can divide it up into equal balls and place them on a baking sheet.
This is just a tease though, they’re still not ready to bake. I recommend you thoroughly spray your sheet before you put the bread blobs on there just to avoid any sticking later. Also it’s a good idea to sprinkle some cornmeal over the top of them. A little tip from the world’s greatest chef, Chef Ramsay to you and me; when you want to coat something evenly if you hold the material in your hand and lightly toss from above your shoulder level aiming downward toward the item you wish to coat it will allow the most evenly distribution of the seasoning. Now that we have them ready we have to play the waiting game again, yes it needs to rise yet again.
No, you’re not seeing things the blobs did double in size and we’ve reduced the number on the sheet by two. That’s what happens when they get bigger, we wanted them to cook evenly without melding into one another so we removed the smallest two to make room to allow them to cook to their full potential. You can cook them all at once, depending on how big your pan and how brave you are but for us this was the best option.  It’s finally time for baking, yay!!!  Big time saver is to have your oven pre-heating when you start the process of letting the blobs rise, that way when they’re finally risen all the way you’re ready to just pop them in the oven.
Quicker than you can watch your favorite episode of Looney tunes, they’ll be done. Just look at them, aren’t they so beautiful. I almost shed a tear when I saw them, my little babies all grown up, I’m such a proud mommy….err I mean…. Cough cough manly talk cough. So anyways I’m getting off topic, they do look so tasty and you should be proud of your accomplishment because believe me when I say they are worth all the time and effort you put into them.
Well crusaders it almost saddens me to say that after all that work you have to perform a little surgery. Now is the time when we slice the top off and hollow them out to make room for the goodness to come. I know it sounds kinda barbaric but trust me this is a necessary process.
This is a good example of how you should end up when you’re waiting to pour the chowder in. Keep the top and all of the innards that you hollowed out of it, they are great for dipping and sopping up chowder that may spill over the sides. Looks delicious as it is doesn’t it, but just wait the best part is still to come. No, I’m not going to show you the finish yet, have to keep you reading somehow don’t I.
I know I’ve already showed you all the ingredients earlier but I just wanted to show them again to reinforce the idea that it really doesn’t take a lot to make this wonderful meal. Now is time for the main event, the reason we’re all here. Time to make the most delicious hearty clam chowder this side of Boston, you can almost hear Cliff Clavin talking to you about a nice bowl of chowdah. We doubled up on a couple of the ingredients just to add some volume  but you can make it as directed and I’m sure it’d turn out just fine.  So I have to admit that this wonderful creation is one of my ultimate comfort foods, nothing says happiness like a big bowl of hot, steamy chowder on a cold day.  There are a couple different food items in this world that I consider myself pretty close to an expert on, clam chowder is one of them. I always make it a point to try clam chowder at a restaurant when it is available, because as a connoisseur I consider it my duty to taste and make comments on all their hard work. I respect what their efforts but I would like to think I can tell if they use canned chowder and if I’m paying good money for it then I expect good food. With that said I’ve made you all wait long enough let’s get started.

There are many different types of clams on the market today; geoduck, steamer, littleneck, quahog, razor, and many others. We chose to go with Manila, manila clams are also known as Japanese clams and chefs everywhere love them for the fact that they are wonderful served either raw or cooked. They are farmed in the pacific coast even though they are not indigenous to the area. When you go to the store you can usually find these little guys, and I say little guys literally as they are usually harvested when little more than an inch in diameter, in the butcher section with all the other fresh seafood. When we got ours they came already prepackaged in a nice little nylon mesh bag and they were pre-soaking in a constant shower of water. This keeps them alive before you buy them and ensures freshness.
Opening the bag is kind of like opening the Christmas present from great aunt Mildred, you’re not entirely sure what’s inside but you’re pretty sure it’s gonna be something you’re not gonna like.


I admit they do look rather uninspiring but they’re just shy and still in their shell. But hey, I bet you don’t look so good first thing in the morning either. They are kinda pretty shells though, don’t ya think?  Almost makes me want to go to the beach and start digging in the sand. So if you’re using fresh clams for your chowder, you can use canned if you want to it’s completely your choice, you have to purge them of the sand they invariably have in their shells.  The way you do this is you have to soak them in a pot in a solution of water, salt, and cornstarch. 

I have to be honest this is a really boring step in the prep process. I suggest that while this is going on you work on other parts of the process to make time pass a little faster. Another thing you can do to make things more entertaining is take a little cornstarch and add a tiny bit of water to it and it’ll turn into both a solid and liquid goo amalgamation in your hand, ironically we used to call it cornstarch goo as kids (ok, so we weren’t the most imaginative name givers on the planet sue me) and it’s fun, easy, and is a treat for adults and kids alike.  To give you an idea of what this looks like, if not for the opaqueness of the pot we used, we also put some in a glass so you can see what exactly is going on.


Once again, kinda uninspiring isn’t it? At least you have your cornstarch goo to keep you occupied.  Ok so roughly an hour later they should have all the sand expunged from the shell and you can drain the water.
An interesting thing when they soak for a long time in this solution they also start to get this false sense of security and think they are back in the ocean . This in turn makes them open up a little bit and peak out of their shells. If you give them a tap on the shell then they’ll usually just zip right back inside, this little guy must’ve been a little on the slow side because he allowed short stack to not only pick him up, but also snap a photo off before he went back inside. Ugly little spud isn’t he, almost looks like a snail to me.  So I’m sad to say but now comes the hard part, for those of you who may be squeamish or have too big of a heart it’s going to be really difficult. Now comes the time where we have to steam the clams, officially ending their time as cute, cuddly friends and beginning their time as delicious, tasty food. 
So you’ve drained all the water out, but oddly enough you need to go and add some more to the pot in order to steam them. Oddly enough though, it’s only using about 1 cup to steam them.  This doesn’t look like it’s going to be enough but keep in mind there will be a lot of water inside the clams themselves.  So just pour those babies in there.
So be prepared, they will make some noise as they steam, try not to let it unnerve you.  If you have to big of a heart to bear listening to them, I suggest you get an assistant to help you. Short stack was too soulful to listen, yet she couldn’t stop looking at them steam. 
Not very interesting, if you ask me.
Still not very interesting, but at least at this point it’s almost done.  If you look close enough you can see that the clams have started to open up.  It’s at this point in the process I started to wonder if you steamed them with wine or even just added seasoning to the water if it would change the flavor of the clams. Maybe next time I’ll try it and you can read about it in a future entry.  Anyways, so they steam very quickly and soon they’ll be ready for removal.
When you look at them you can tell they’re done when the shell is open. If you look at them and the shell is closed that means that the clam was dead long before you got there and you should just discard it. They look pretty tasty like they are, but just fight the temptation and remember what you’re working towards. So now you need to remove all the clams from the pot without losing the liquid. In case you were sleeping through high school science class; steam is hot, it hurts when it touches skin, so be careful doing this. We used tongs to do it ourselves, remember to get rid of the closed ones. Wouldn’t you know it we were in luck and all ours opened.
Next you need to take the pot they were soaking in and pour it over a bowl/pitcher that has been covered with cheese cloth or some other form of fine mesh. Hold on to the liquid left behind as it makes a nice clam stock (also called clam liquor) for a base in other seafood soups, but in this case you will be using it again later on in making our chowder.  After you’ve done this, we need to begin the really tedious process of chopping the clams. In order to do this though you need to take them out of their shells and that’s part of the tedium. We decided that the best thing to do was to take them out of the shell and right into a bowl.
Wow, out of the shells they’re a lot less pretty, and it’s hard to believe that what was so bulky in the shell is so small out of it. But believe me that little bit goes a long way, especially if you chop them very finely. This is another time when it really pays to have an assistant, thank you Short Stack for de-shelling and chopping them.
Wow, they’re even uglier chopped up.  So while you’re faithful compatriot is taking them out of the shell and chopping them up, you can be doing other things to help move things along faster. My choice was to work on my favorite part of any meal.
Ta dah!! The hallmark of any good meal, the most delicious of all meats, BACON!!!!! And this is not just any bacon; this is the most uber tastiest of succulent bacon available at my neighborhood grocery store. It’s also thick cut, making it all the better.  So you now are given the honor of handling this most glorious of meats, and have to chop it up into little bits.  You do this so it will not only cook faster but also because then it complements the clams.
 Personally I like to think of the bacon and clams as superheroes and the 2 team up and work together in an alliance of deliciousness to vanquish hunger forever.  Anyways, I’m getting sidetracked again. So you need to cook the bacon just to the edge of crispiness but don’t overdo it, so keep stirring constantly.  And once you get it to this point, you need to add the onions and seasonings.
Wow, just look at that, almost looks good enough to eat on its own. So while that cooks, just take a few moments while this is cooking to just sit back and take a nice smell of it. Almost intoxicating how delicious it smells. We have to let that sauté for quite a bit to let the onions cook through. Keep an eye on them though, when the onions brown and get almost see through you know it’s time to move on.
Once again, I know it’s tempting to just eat this on its own but you must continue to resist.  I had to keep reminding myself that the chowder would be worth the wait. It is hard though because that alone smelled amazing. I just want to find a way to make an air freshener that I can put in my car that makes it smell like sautéing bacon and onions.  Next thing we need to do is add the milk, left over clam liquid, potatoes and butter.  After you add all of that you need to bring it to a boil and then immediately back down to a simmer. You want to let it simmer for about 10 or so minutes until your potatoes get tender.
This looks done doesn’t it, but don’t be fooled by this biggest tease of them all. I almost threw in the towel and said it that it was good like that. Who wouldn’t think that looks good and you should just imagine the smell.  It’s even better than before if you can believe it. I couldn’t stop smelling it and just imagining how great it would be to shrink myself down and swim around in it. Awww that’d be the life; living easy,  doing the backstroke in a delicious bowl of clam chowder, maybe even use a cracker as a life raft and tootle around without a care.   Oh that’s right there’s still one more step, I almost forgot.
You need to add the cream and clams, I mean come on what’s clam chowder without clams. This takes the least amount of time to cook, only about 2-3 minutes. You don’t want to overcook the clams trust me, they’ll get incredibly chewy and it’ll be like eating a rubber band.  We’re at the finish line now so don’t get lazy, let that simmer like I said and then it’ll be done. We’ve finally reached the very best part of our journey serve and enjoy.
This is easy and kind of fun too, just take your already hollowed out bread bowl from earlier and ladle in some of your masterpiece. Best part is, if you eat carefully you can just refill the bowl over and over, or heck just make another one and keep enjoying the fruits of your labor. Words cannot describe how delicious this chowder is and it’s made all the better because you know that you made it all yourself. I don’t want to even try to explain how wonderful this was. One thing I was worried about, and I’m sure that you probably are too, is how would it be reheated? Well if you eat it all in one sitting you won’t have to worry about that, but on the off chance that there is still some left then rest assured it reheats like a champ. It’s just as delicious no matter what time you eat it or how much you have. If you’ve read this far I suppose I owe it to you to provide the links to the recipes like I promised you. 
Well Crusaders, this meal is beyond delicious and I hope you get to experience it for yourself. My only regret is that I didn’t make more of it, but that gives me something to do in the future.  I had so much fun making it and I couldn’t have done it without the help of my lovely assistant Short Stack. I really can’t recommend this enough if you have an afternoon to kill and want some amazing food.  There’s not much more I can say that I haven’t said; so thanks for sticking in there, I really appreciate your loyalty and readership. Until next time happy hunting and Bon appetite.

Indiana Joe