Good Afternoon Crusaders,
Hello
everyone and welcome again to your favorite guide to all things edible and
delectable. I hope you all read my last appeteasers section and it made you
hungry, because boy do I have a treat for you. Tonight was one of my proudest
cooking experiences that I’ve ever had, and it made me proud to be a foodie.
Although it wasn’t exactly the cheapest of meals the end result was priceless.
I bet you’re wanting me to hurry up and tell you what exactly it was that was
so good I feel that if this were medieval times that minstrels would sing
ballads about it for years to come. Well just so I can keep you as my loyal
crusaders I’ll tell you, short stack and I made homemade clam chowder in
homemade bread bowls and we made it all by hand and all from the ground up. That’s
right there’s no Campbell’s cans hiding in the back ground I promise you.
I respect you all too much to lie to you and
hide facts from you, it was not a cheap dinner and some of the ingredients were
hard to obtain. I should also let you know that I had to cheat and use recipes
this was not just off the top of my head. I know, I know I’m sorry but even the
mighty need help sometimes. I’d never made either of these items before so I
had to get some advice from someone who’s been there. Who better to ask than
the mightiest of the mighty? Go for the internet and take your pick of the best
around. I should also let you know that we kind of jumped around between
starting the bread bowls and working on making the chowder. Short Stack and I
both worked hard on this so you’ll have to forgive me if it doesn’t seem like
there’s a logical order to what we did. I will try to keep things as best I can
in some sort of order. When necessary we multitasked and did multiple jobs at
once to make things easier. Please bear with me and don’t nitpick too much on
the progression. In order to keep you
reading I’ll wait until the end to post the links. *Insert Evil Laugh Here* so
let’s get started right away.

Well what better way to start a
long journey into the unknown than by making sure that you have all the
necessary items you need. This veritable cornucopia of food stuffs is all you
need to make 8, yes that’s right 8, bread bowls and about 5 cups of hearty
chowder. It doesn’t really look like all that much stuff does it? That’s
because it’s really not when get right down to it. I’m sure many of you were
are probably like me and thought that a lot goes into making something so
delicious, though it just isn’t true I promise. The hardest part really is getting everything
all together and just taking the time and effort to do it.
Remember when I said that there’s
not a real order to speak of, well we’re going to start by talking about the bread
bowls and how those were made. Those were the easier of the two items and add a
great touch of elegance to the meal. Anyone serve chowder in a bowl but it
takes true talent to serve it in a bowl you can eat, at least I’d like to think
so. I should let you know that we made
these bread bowls all by hand, that’s right no bread machines here, and I know
that probably scares a lot of you but I promise that it really isn’t as hard as
we’ve all been lead to believe.

First we had to mix everything
together until it’s roughly the consistency of goop. I think that’s even the
technical term of bread before it’s solidified into loaf form. Before you say anything, yes we used an
electric mixer, we had no other choice my hand mixer was busy being an antique.
Moving on, once you get it nice and soupy you have to add lots and lots of
flour to thicken it up.

There, that ought to do it! It
takes a lot of flour to make this bread so don’t think freak out if it looks
like you’ve added too much. Just fight
your instinct to stop and add what the recipe calls for.

Now comes the best part though, pretend that
you’re back in colonial times and knead the heck out of that sucker. According
the wonderful folks over at Williams-Sonoma kneading is defined as “folding and
pressing dough repeatedly to develop the structure of bread. During kneading the gluten in flour
interlocks to create and elastic network that captures gases and stretches as
the bread rises.” In other words just
work it around in your hands like you’re a little kid who just got his first
thing of play-do. Throw it back and forth with a friend for a quick exercise,
put it on your table and pound it like it’s the boss’s face, or just squish it
between your fingers for a giddy little thrill. Whatever you like to do just
don’t stop for about 10 minutes. There is one problem though if you’re making
this with a partner they’re gonna want in on the action so don’t be stingy, you
do it for 5 minutes and then let them do it for the last 5 minutes. It’s fun,
it relieves some stress, and you’re making good food in the process. Just don’t
do it too long or it can make the dough way to gloopy and flexible and who
needs that.

.JPG)
Amazed aren’t you? ZING!!! It’s
almost doubled in size. Pretty cool huh? I know, I know I’m pretty good
magician. Ok well in actuality it’s because of the yeast but still pretty cool.
Anyways welcome to stage two, now that the dough has risen significantly we can
divide it up into equal balls and place them on a baking sheet.


No, you’re not seeing things the blobs
did double in size and we’ve reduced the number on the sheet by two. That’s
what happens when they get bigger, we wanted them to cook evenly without
melding into one another so we removed the smallest two to make room to allow
them to cook to their full potential. You can cook them all at once, depending
on how big your pan and how brave you are but for us this was the best
option. It’s finally time for baking,
yay!!! Big time saver is to have your
oven pre-heating when you start the process of letting the blobs rise, that way
when they’re finally risen all the way you’re ready to just pop them in the
oven.

Quicker than you can watch your
favorite episode of Looney tunes, they’ll be done. Just look at them, aren’t
they so beautiful. I almost shed a tear when I saw them, my little babies all
grown up, I’m such a proud mommy….err I mean…. Cough cough manly talk cough. So
anyways I’m getting off topic, they do look so tasty and you should be proud of
your accomplishment because believe me when I say they are worth all the time
and effort you put into them.
Well crusaders it almost saddens me
to say that after all that work you have to perform a little surgery. Now is
the time when we slice the top off and hollow them out to make room for the
goodness to come. I know it sounds kinda barbaric but trust me this is a
necessary process.

This is a good example of how you
should end up when you’re waiting to pour the chowder in. Keep the top and all
of the innards that you hollowed out of it, they are great for dipping and
sopping up chowder that may spill over the sides. Looks delicious as it is
doesn’t it, but just wait the best part is still to come. No, I’m not going to
show you the finish yet, have to keep you reading somehow don’t I.


There are many different types of
clams on the market today; geoduck, steamer, littleneck, quahog, razor, and
many others. We chose to go with Manila, manila clams are also known as
Japanese clams and chefs everywhere love them for the fact that they are
wonderful served either raw or cooked. They are farmed in the pacific coast
even though they are not indigenous to the area. When you go to the store you
can usually find these little guys, and I say little guys literally as they are
usually harvested when little more than an inch in diameter, in the butcher section
with all the other fresh seafood. When we got ours they came already
prepackaged in a nice little nylon mesh bag and they were pre-soaking in a
constant shower of water. This keeps them alive before you buy them and ensures
freshness.


I admit they do look rather
uninspiring but they’re just shy and still in their shell. But hey, I bet you
don’t look so good first thing in the morning either. They are kinda pretty
shells though, don’t ya think? Almost
makes me want to go to the beach and start digging in the sand. So if you’re
using fresh clams for your chowder, you can use canned if you want to it’s
completely your choice, you have to purge them of the sand they invariably have
in their shells. The way you do this is
you have to soak them in a pot in a solution of water, salt, and cornstarch.


I
have to be honest this is a really boring step in the prep process. I suggest
that while this is going on you work on other parts of the process to make time
pass a little faster. Another thing you can do to make things more entertaining
is take a little cornstarch and add a tiny bit of water to it and it’ll turn
into both a solid and liquid goo amalgamation in your hand, ironically we used
to call it cornstarch goo as kids (ok, so we weren’t the most imaginative name
givers on the planet sue me) and it’s fun, easy, and is a treat for adults and
kids alike. To give you an idea of what
this looks like, if not for the opaqueness of the pot we used, we also put some
in a glass so you can see what exactly is going on.


Once again, kinda uninspiring isn’t
it? At least you have your cornstarch goo to keep you occupied. Ok so roughly an hour later they should have
all the sand expunged from the shell and you can drain the water.

An interesting thing when they soak
for a long time in this solution they also start to get this false sense of
security and think they are back in the ocean . This in turn makes them open up
a little bit and peak out of their shells. If you give them a tap on the shell
then they’ll usually just zip right back inside, this little guy must’ve been a
little on the slow side because he allowed short stack to not only pick him up,
but also snap a photo off before he went back inside. Ugly little spud isn’t
he, almost looks like a snail to me. So
I’m sad to say but now comes the hard part, for those of you who may be
squeamish or have too big of a heart it’s going to be really difficult. Now
comes the time where we have to steam the clams, officially ending their time
as cute, cuddly friends and beginning their time as delicious, tasty food.

So you’ve drained all the water
out, but oddly enough you need to go and add some more to the pot in order to
steam them. Oddly enough though, it’s only using about 1 cup to steam
them. This doesn’t look like it’s going
to be enough but keep in mind there will be a lot of water inside the clams
themselves. So just pour those babies in
there.

So be prepared, they will make some
noise as they steam, try not to let it unnerve you. If you have to big of a heart to bear listening
to them, I suggest you get an assistant to help you. Short stack was too
soulful to listen, yet she couldn’t stop looking at them steam.

Not very interesting, if you ask
me.

.JPG)
When you look at them you can tell
they’re done when the shell is open. If you look at them and the shell is
closed that means that the clam was dead long before you got there and you
should just discard it. They look pretty tasty like they are, but just fight
the temptation and remember what you’re working towards. So now you need to
remove all the clams from the pot without losing the liquid. In case you were
sleeping through high school science class; steam is hot, it hurts when it
touches skin, so be careful doing this. We used tongs to do it ourselves,
remember to get rid of the closed ones. Wouldn’t you know it we were in luck
and all ours opened.
Next you need to take the pot they were soaking
in and pour it over a bowl/pitcher that has been covered with cheese cloth or
some other form of fine mesh. Hold on to the liquid left behind as it makes a
nice clam stock (also called clam liquor) for a base in other seafood soups,
but in this case you will be using it again later on in making our
chowder. After you’ve done this, we need
to begin the really tedious process of chopping the clams. In order to do this
though you need to take them out of their shells and that’s part of the tedium.
We decided that the best thing to do was to take them out of the shell and
right into a bowl. 

Wow, they’re even uglier chopped
up. So while you’re faithful compatriot
is taking them out of the shell and chopping them up, you can be doing other
things to help move things along faster. My choice was to work on my favorite
part of any meal.

Ta dah!! The hallmark of any good
meal, the most delicious of all meats, BACON!!!!! And this is not just any bacon;
this is the most uber tastiest of succulent bacon available at my neighborhood
grocery store. It’s also thick cut, making it all the better. So you now are given the honor of handling
this most glorious of meats, and have to chop it up into little bits. You do this so it will not only cook faster
but also because then it complements the clams.

Personally I like to think of the bacon and
clams as superheroes and the 2 team up and work together in an alliance of
deliciousness to vanquish hunger forever. Anyways, I’m getting sidetracked again. So you
need to cook the bacon just to the edge of crispiness but don’t overdo it, so
keep stirring constantly. And once you
get it to this point, you need to add the onions and seasonings.


Once again, I know it’s tempting to
just eat this on its own but you must continue to resist. I had to keep reminding myself that the
chowder would be worth the wait. It is hard though because that alone smelled
amazing. I just want to find a way to make an air freshener that I can put in
my car that makes it smell like sautéing bacon and onions. Next thing we need to do is add the milk,
left over clam liquid, potatoes and butter.
After you add all of that you need to bring it to a boil and then
immediately back down to a simmer. You want to let it simmer for about 10 or so
minutes until your potatoes get tender.
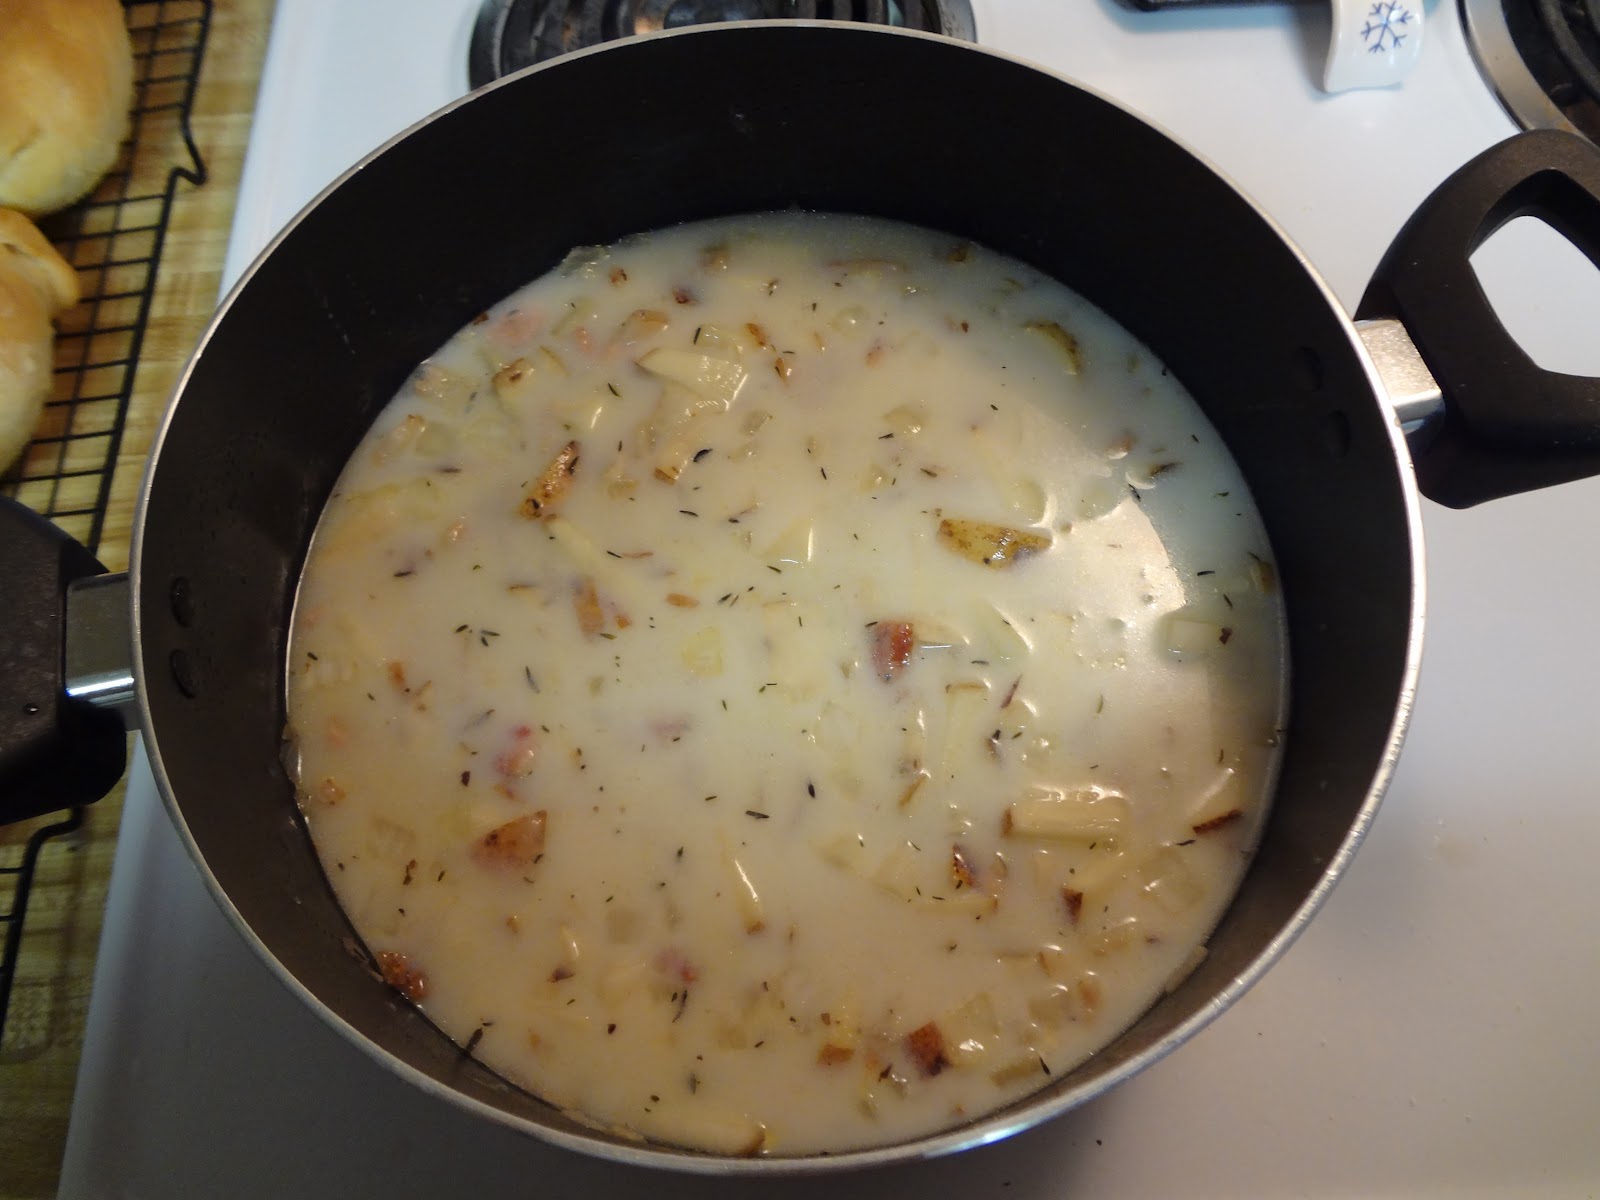
This looks done doesn’t it, but
don’t be fooled by this biggest tease of them all. I almost threw in the towel
and said it that it was good like that. Who wouldn’t think that looks good and
you should just imagine the smell. It’s
even better than before if you can believe it. I couldn’t stop smelling it and
just imagining how great it would be to shrink myself down and swim around in
it. Awww that’d be the life; living easy,
doing the backstroke in a delicious bowl of clam chowder, maybe even use
a cracker as a life raft and tootle around without a care. Oh that’s right there’s still one more step,
I almost forgot.

You need to add the cream and
clams, I mean come on what’s clam chowder without clams. This takes the least
amount of time to cook, only about 2-3 minutes. You don’t want to overcook the
clams trust me, they’ll get incredibly chewy and it’ll be like eating a rubber
band. We’re at the finish line now so
don’t get lazy, let that simmer like I said and then it’ll be done. We’ve
finally reached the very best part of our journey serve and enjoy.

This is easy and kind of fun too,
just take your already hollowed out bread bowl from earlier and ladle in some
of your masterpiece. Best part is, if you eat carefully you can just refill the
bowl over and over, or heck just make another one and keep enjoying the fruits
of your labor. Words cannot describe how delicious this chowder is and it’s
made all the better because you know that you made it all yourself. I don’t
want to even try to explain how wonderful this was. One thing I was worried
about, and I’m sure that you probably are too, is how would it be reheated?
Well if you eat it all in one sitting you won’t have to worry about that, but
on the off chance that there is still some left then rest assured it reheats
like a champ. It’s just as delicious no matter what time you eat it or how much
you have. If you’ve read this far I suppose I owe it to you to provide the links
to the recipes like I promised you.
Bread Bowl Link- http://allrecipes.com/recipe/bread-bowls/detail.aspx?event8=1&prop24=SR_Title&e11=bread%20bowl&e8=Quick%20Search&event10=1&e7=Home%20Page
Well Crusaders, this meal is beyond
delicious and I hope you get to experience it for yourself. My only regret is
that I didn’t make more of it, but that gives me something to do in the
future. I had so much fun making it and
I couldn’t have done it without the help of my lovely assistant Short Stack. I
really can’t recommend this enough if you have an afternoon to kill and want
some amazing food. There’s not much more
I can say that I haven’t said; so thanks for sticking in there, I really
appreciate your loyalty and readership. Until next time happy hunting and Bon
appetite.
Indiana Joe
No comments:
Post a Comment